4. Task by yourself – „Gift Yourself a Trophy“
| Site: | Bios4You |
| Course: | (5) Let's Create a World with Tinkercad |
| Book: | 4. Task by yourself – „Gift Yourself a Trophy“ |
| Printed by: | Guest user |
| Date: | Saturday, 24 October 2026, 2:57 PM |
Task by yourself – „Gift Yourself a Trophy“
OBJECTIVE
Design a 3D trophy using Tinkercad by applying the skills learned in previous exercises.
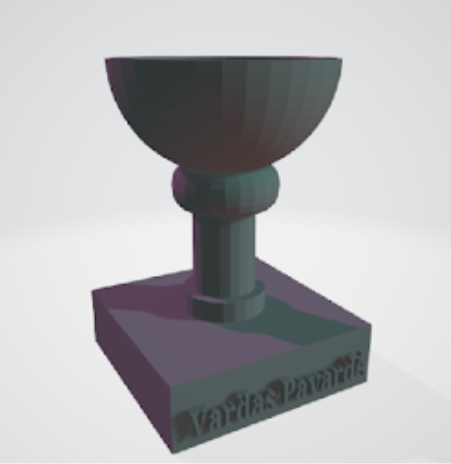
Figure 20. Task goal - modeled cup
Task Completion Steps
Step 1: Create the Base
- Insert a red box from the Basic Shapes Library.
- Adjust its dimensions:
- Length: 100 mm
- Width: 100 mm
- Height: 30 mm
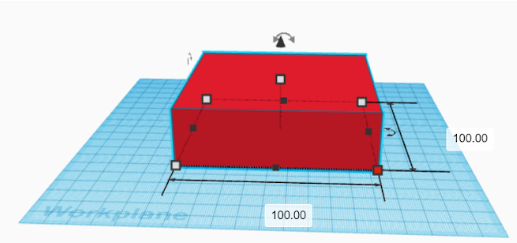
Figure 21. Modeling the Base
Step 2: Add the First Ring
- Insert a ring shape.
- Set its dimensions:
- Length: 40 mm
- Width: 40 mm
- Align it in the center of the red base.
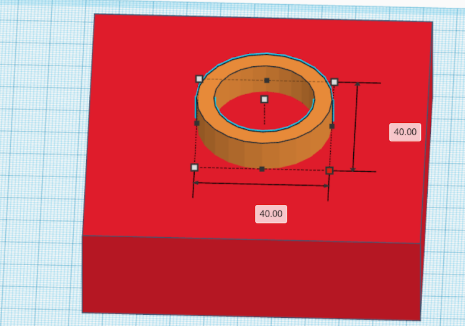
Figure 22. Base Ring Placement
Step 3: Create the Trophy Stem
- Insert a cylinder.
- Adjust its dimensions:
- Length: 30 mm
- Width: 30 mm
- Height: 100 mm
- Place it on top of the base inside the ring.
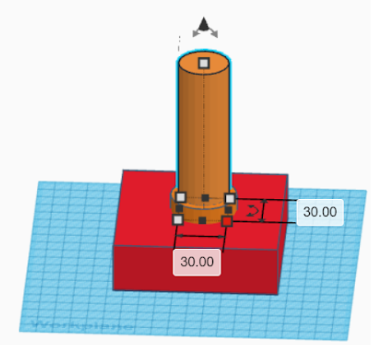
Figure 23. Forming the Trophy Stem
Step 4: Add the Second Ring
- Insert a blue ring.
- Adjust its dimensions:
- Length: 50 mm
- Width: 50 mm
- Height: 30 mm
- Position it on the cylinder, 80 mm from the ground.
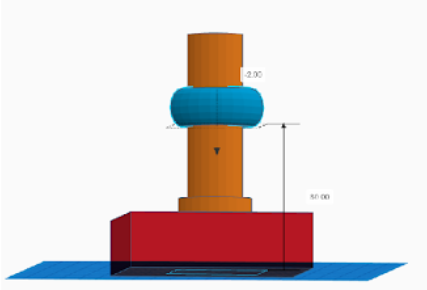
Figure 24. Adding the Second Ring
Step 5: Create the Trophy Cup
- Insert a half-sphere and rotate it 180°.
- Adjust its dimensions:
- Length: 100 mm
- Width: 100 mm
- Height: 50 mm
- Place it on top of the cylinder, 96 mm from the ground.
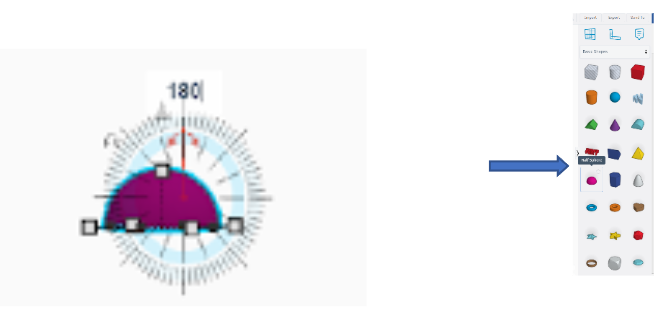
Figure 25. A hemisphere loaded and rotated 180 degrees
View from Above:
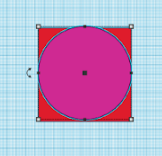
Figure 26. Cup viewed from above
View from Front:
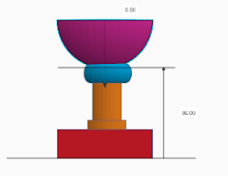
Figure 27. Cup viewed from front
Step 6: Hollow Out the Cup
- Copy the half-sphere using CTRL+C -> CTRL+V.
- Adjust the copied half-sphere’s size:
- Length: 80 mm
- Width: 80 mm
- Position it inside the larger half-sphere.
- Change the material to "HOLE" to create an empty space.
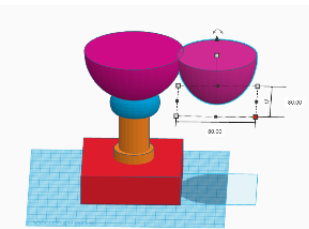
Figure 28. Creating the Inner Half-Sphere by Copying the Outer Half-Sphere
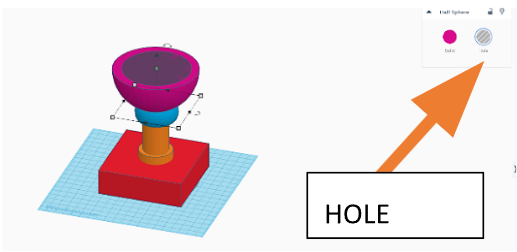
Figure 29: Changing the Inner Half-Sphere Material
Step 7: Add a Nameplate
-
Insert a text object and write your name.
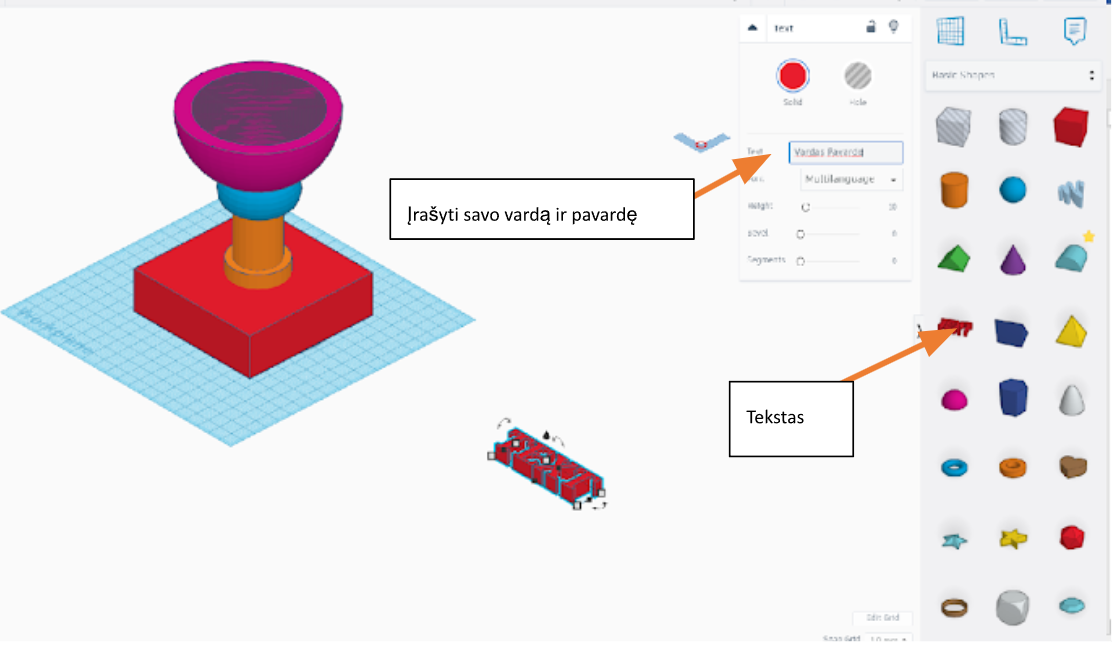
Figure 30. Creating Raised Letters
-
Rotate the text 90°.
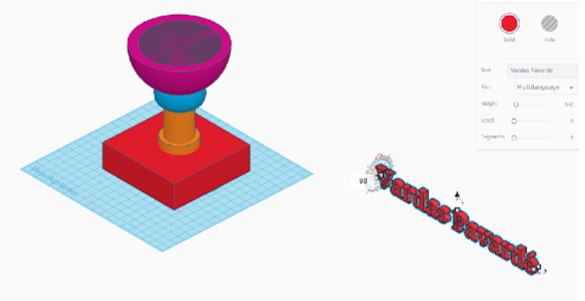
Figure 31. Rotating Text 90°
- Resize the text to fit on the side of the red base.
- Move and embed it slightly into the box.
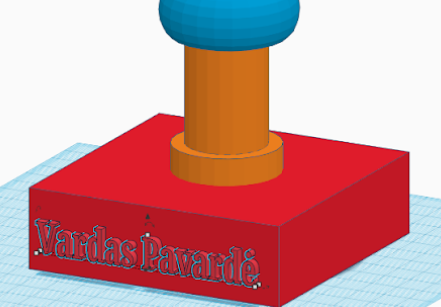
Figure 32. Positioning the Name on the Base
Step 8: Finalizing the Model
-
Select all objects and group them together.
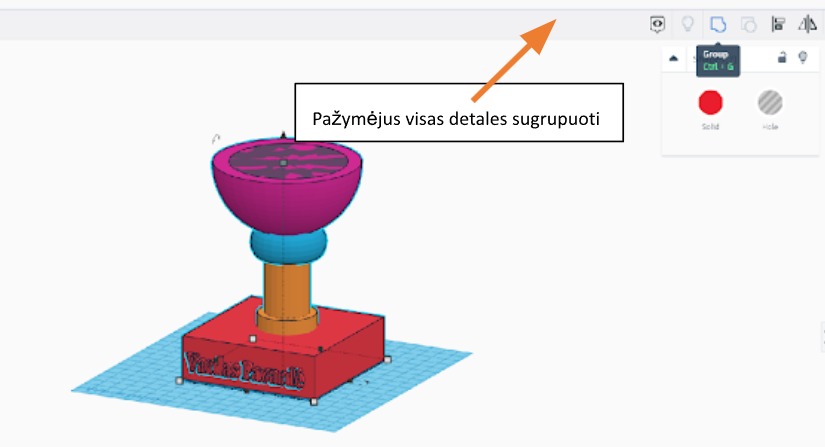
Figure 33. Grouping All Components
Step 9: Export for 3D Printing
-
Click "Export" and choose ".STL" format.
-
Save the STL file to your computer.
The trophy is now ready for 3D printing! 🏆
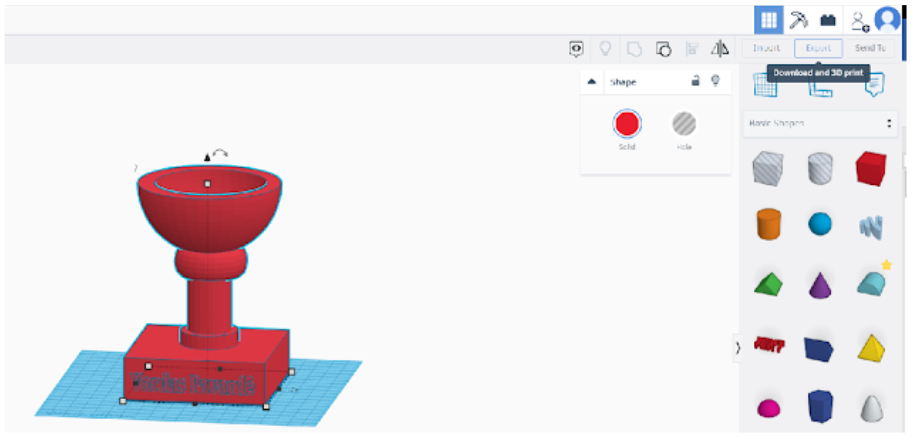
Figure 34. Exporting the Model
Enhance with AR
To further enrich the learning experience in Let's Create a World with Tinkercad, students are encouraged to integrate Augmented Reality (AR) into their design process. After completing their 3D models, learners can export their creations to AR platforms such as Tinkercad AR Viewer, Sketchfab, or WebAR solutions. This allows them to project their models into real-world environments using smartphones or tablets, providing a unique perspective on their designs. For instance, students can visualize their trophies placed on a real table or see how their hollow cylinders would look in a practical setting. Using AR not only helps in evaluating the design's proportions and aesthetics but also brings their virtual creations to life.
For more advanced AR integration, tools like ZapWorks, 8th Wall, or BlippAR can be used to create interactive, marker-based AR experiences. These platforms allow students to generate QR codes or links that can be shared with others for collaborative review and feedback. By incorporating AR, students gain a deeper understanding of spatial visualization and enhance their digital creativity skills, making the learning process more interactive and engaging.
Recommendations for additional AR tools
-
Tinkercad AR Viewer: Tinkercad offers a built-in AR viewing tool that allows students to export their 3D models directly into an augmented reality environment. After designing their objects (such as the trophy or hollow cylinder), students can view them in real-time through their tablets devices by selecting the AR viewing option within Tinkercad. This feature helps learners visualize the scale and placement of their models in a real-world context—like seeing how a designed object fits on a desk or shelf—before finalizing their designs or moving on to 3D printing.
-
Sketchfab: enables users to upload their 3D models and easily view them in AR using mobile devices. Students can export their Tinkercad designs in compatible formats (like .OBJ or .STL) and upload them to Sketchfab’s platform. Once uploaded, they can use the Sketchfab app or browser-based AR features to project their models into physical spaces. This is especially useful for sharing designs with classmates or teachers, as the platform allows for easy sharing via links. For example, students can showcase their trophy designs during presentations, allowing viewers to see the models in their intended physical context.
-
ZapWorks / 8th Wall / WebAR: These platforms offer more advanced AR capabilities by enabling the creation of marker-based or markerless AR experiences. Students can design interactive AR content that can be integrated into educational materials. For example:
-
ZapWorks allows students to create QR codes linked to their 3D models. By scanning the QR code, users can view the models in AR directly through a web browser, eliminating the need for a separate app.
-
8th Wall supports the development of more dynamic AR experiences, such as embedding animations or interactive elements into the models. This could be used for projects where students add explanations or annotations to their 3D designs, making the learning experience more immersive.
-
WebAR solutions offer browser-based AR experiences, allowing students to embed AR content directly into a learning platform or website. This can be especially effective for collaborative tasks where students can share their AR-enhanced models with peers for feedback.
By using these technologies, students not only improve their understanding of 3D modeling but also develop skills in integrating digital designs into real-world applications, fostering creativity and enhancing problem-solving abilities.