
2. 3D printing
3D printing principles and 3D modelling
3D Printing Process
The printing process can be represented by the sequence shown in Figure 13:

Figure 13. 3D printing process
Once the model has been created by the modelling program, it must be saved in *.STL format. This format is for 3D printing. In this way, the program recognizes the information in the file and divides the model itself into layers. The 3D printer starts working from the lowest layer, filling in all the information. It then moves to the next layer until all the layers are printed vertically.
It is necessary to know the basic parts of a 3D printer to understand the printing process.
There may be various printer modifications depending on the needs, type, price and other criteria. However, the basic parts remain the same. By default, such a printer consists of a spool of material (1). It can be plastic, metal, glass or others. Also the print head (2) moving transversely and longitudinally. The printable height of the model is adjusted by a sliding background (Figure 14).
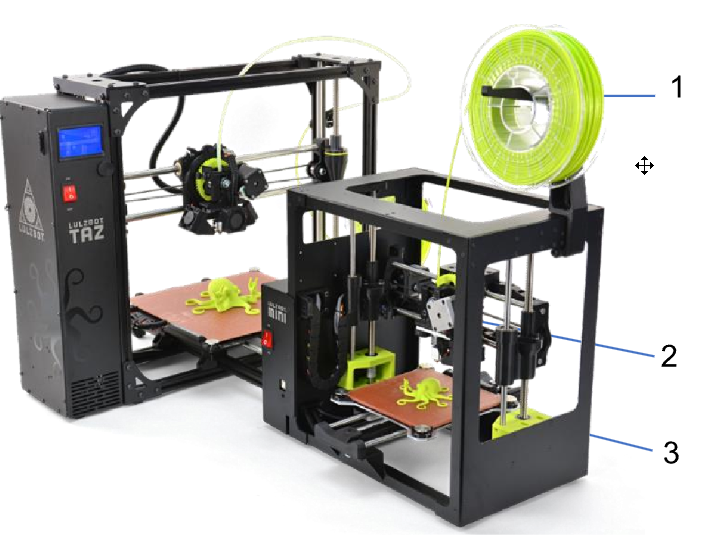
Figure 14. 3D printer
When the model is divided into layers, printing starts from the lowest layer. The print head (Figure 15a), after melting the feed material (1) from the spool, prints one layer horizontally (Figure 15b). Then move on to the next one.

Figure 15a. Printhead

Figure 15b. One layer is printed